Blog #3 - Windy, Sugar, Bre & Boopsie
2025 has been a big year of personal growth for me—learning how to lean into my go-getter creative energy while also navigating burnout is no small feat. So when Amy Drake Daspit came to me with the idea of gifting a fellow equestrian a photo of her beloved four-legged family members for Christmas, how could I possibly say no? I’ll admit it—my first attempt at this composition had me questioning my life choices a bit. But seeing her vision slowly come to life? Hands down one of the most rewarding experiences of my year.
Of course, none of it would’ve been possible without my village—I’m endlessly grateful for mine, especially my incredible assistants on this shoot, Jackie Latino-Moran of @jmoranphotos and the amazing Amy Drake Daspit.
To give you a peek behind the curtain, here’s a little behind-the-scenes look—letting the photos do most of the talking—at each step and how it all came together to bring this vision to life.
Step 1: Photographing Each Animal Individually
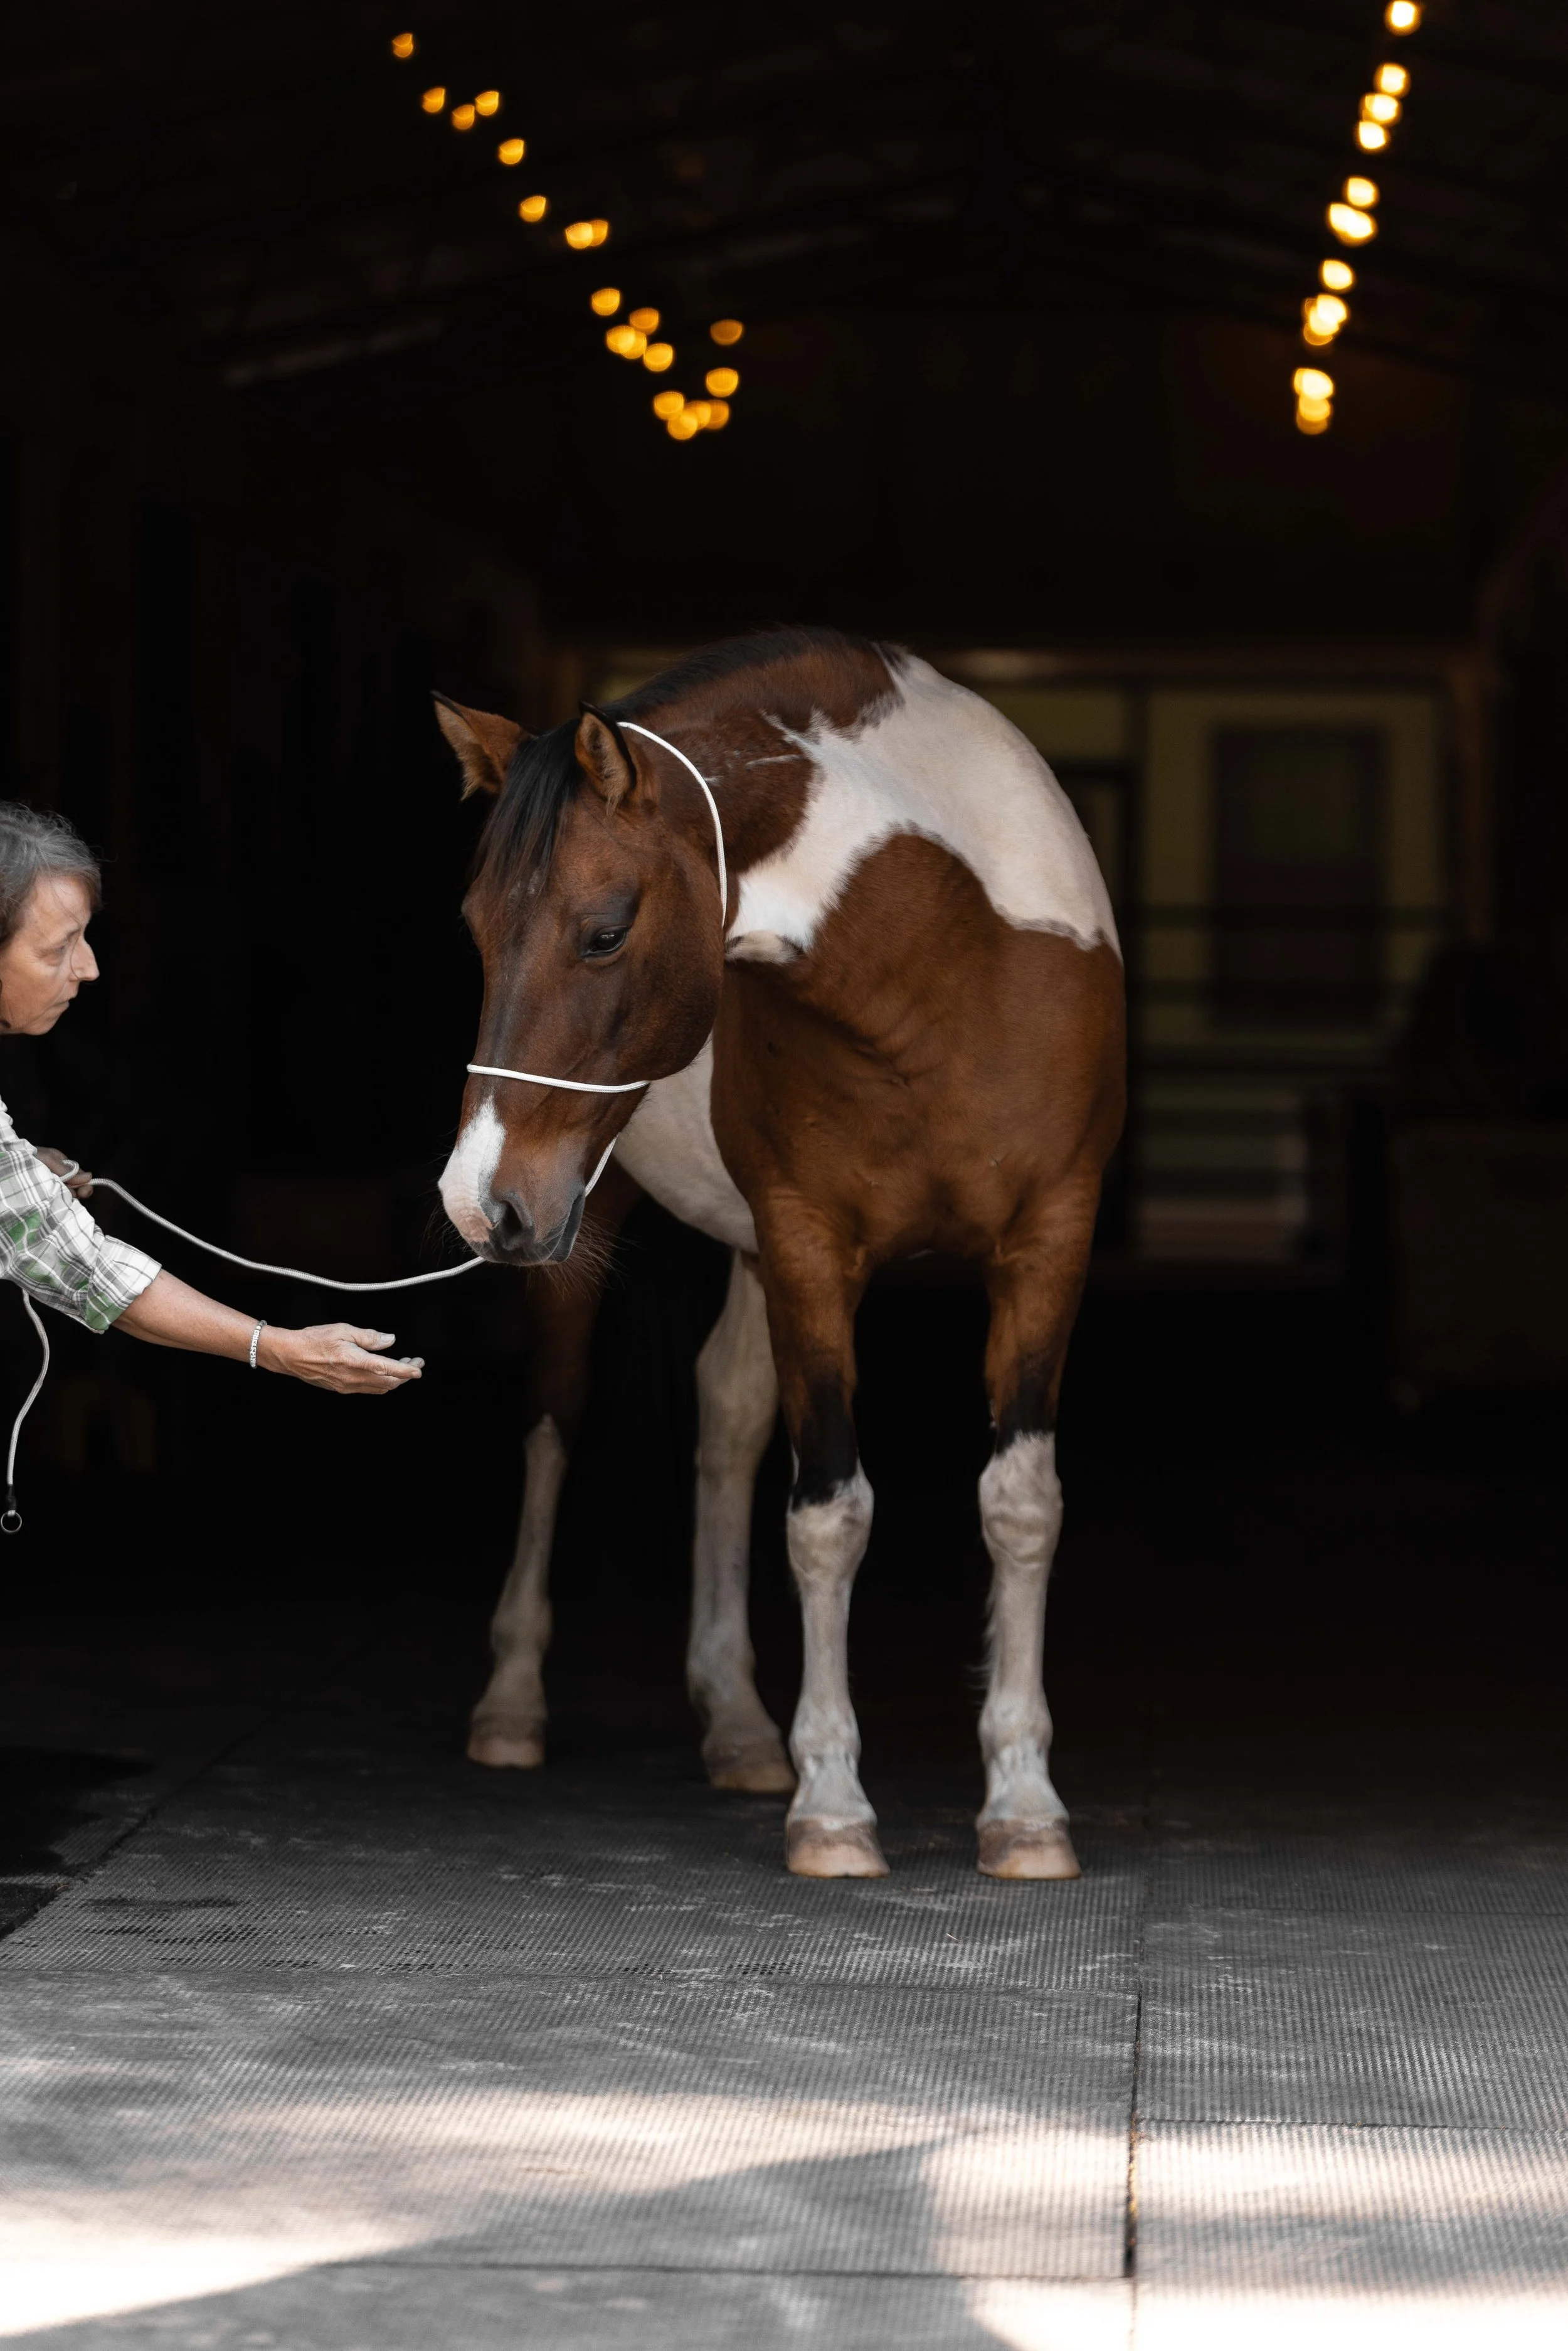
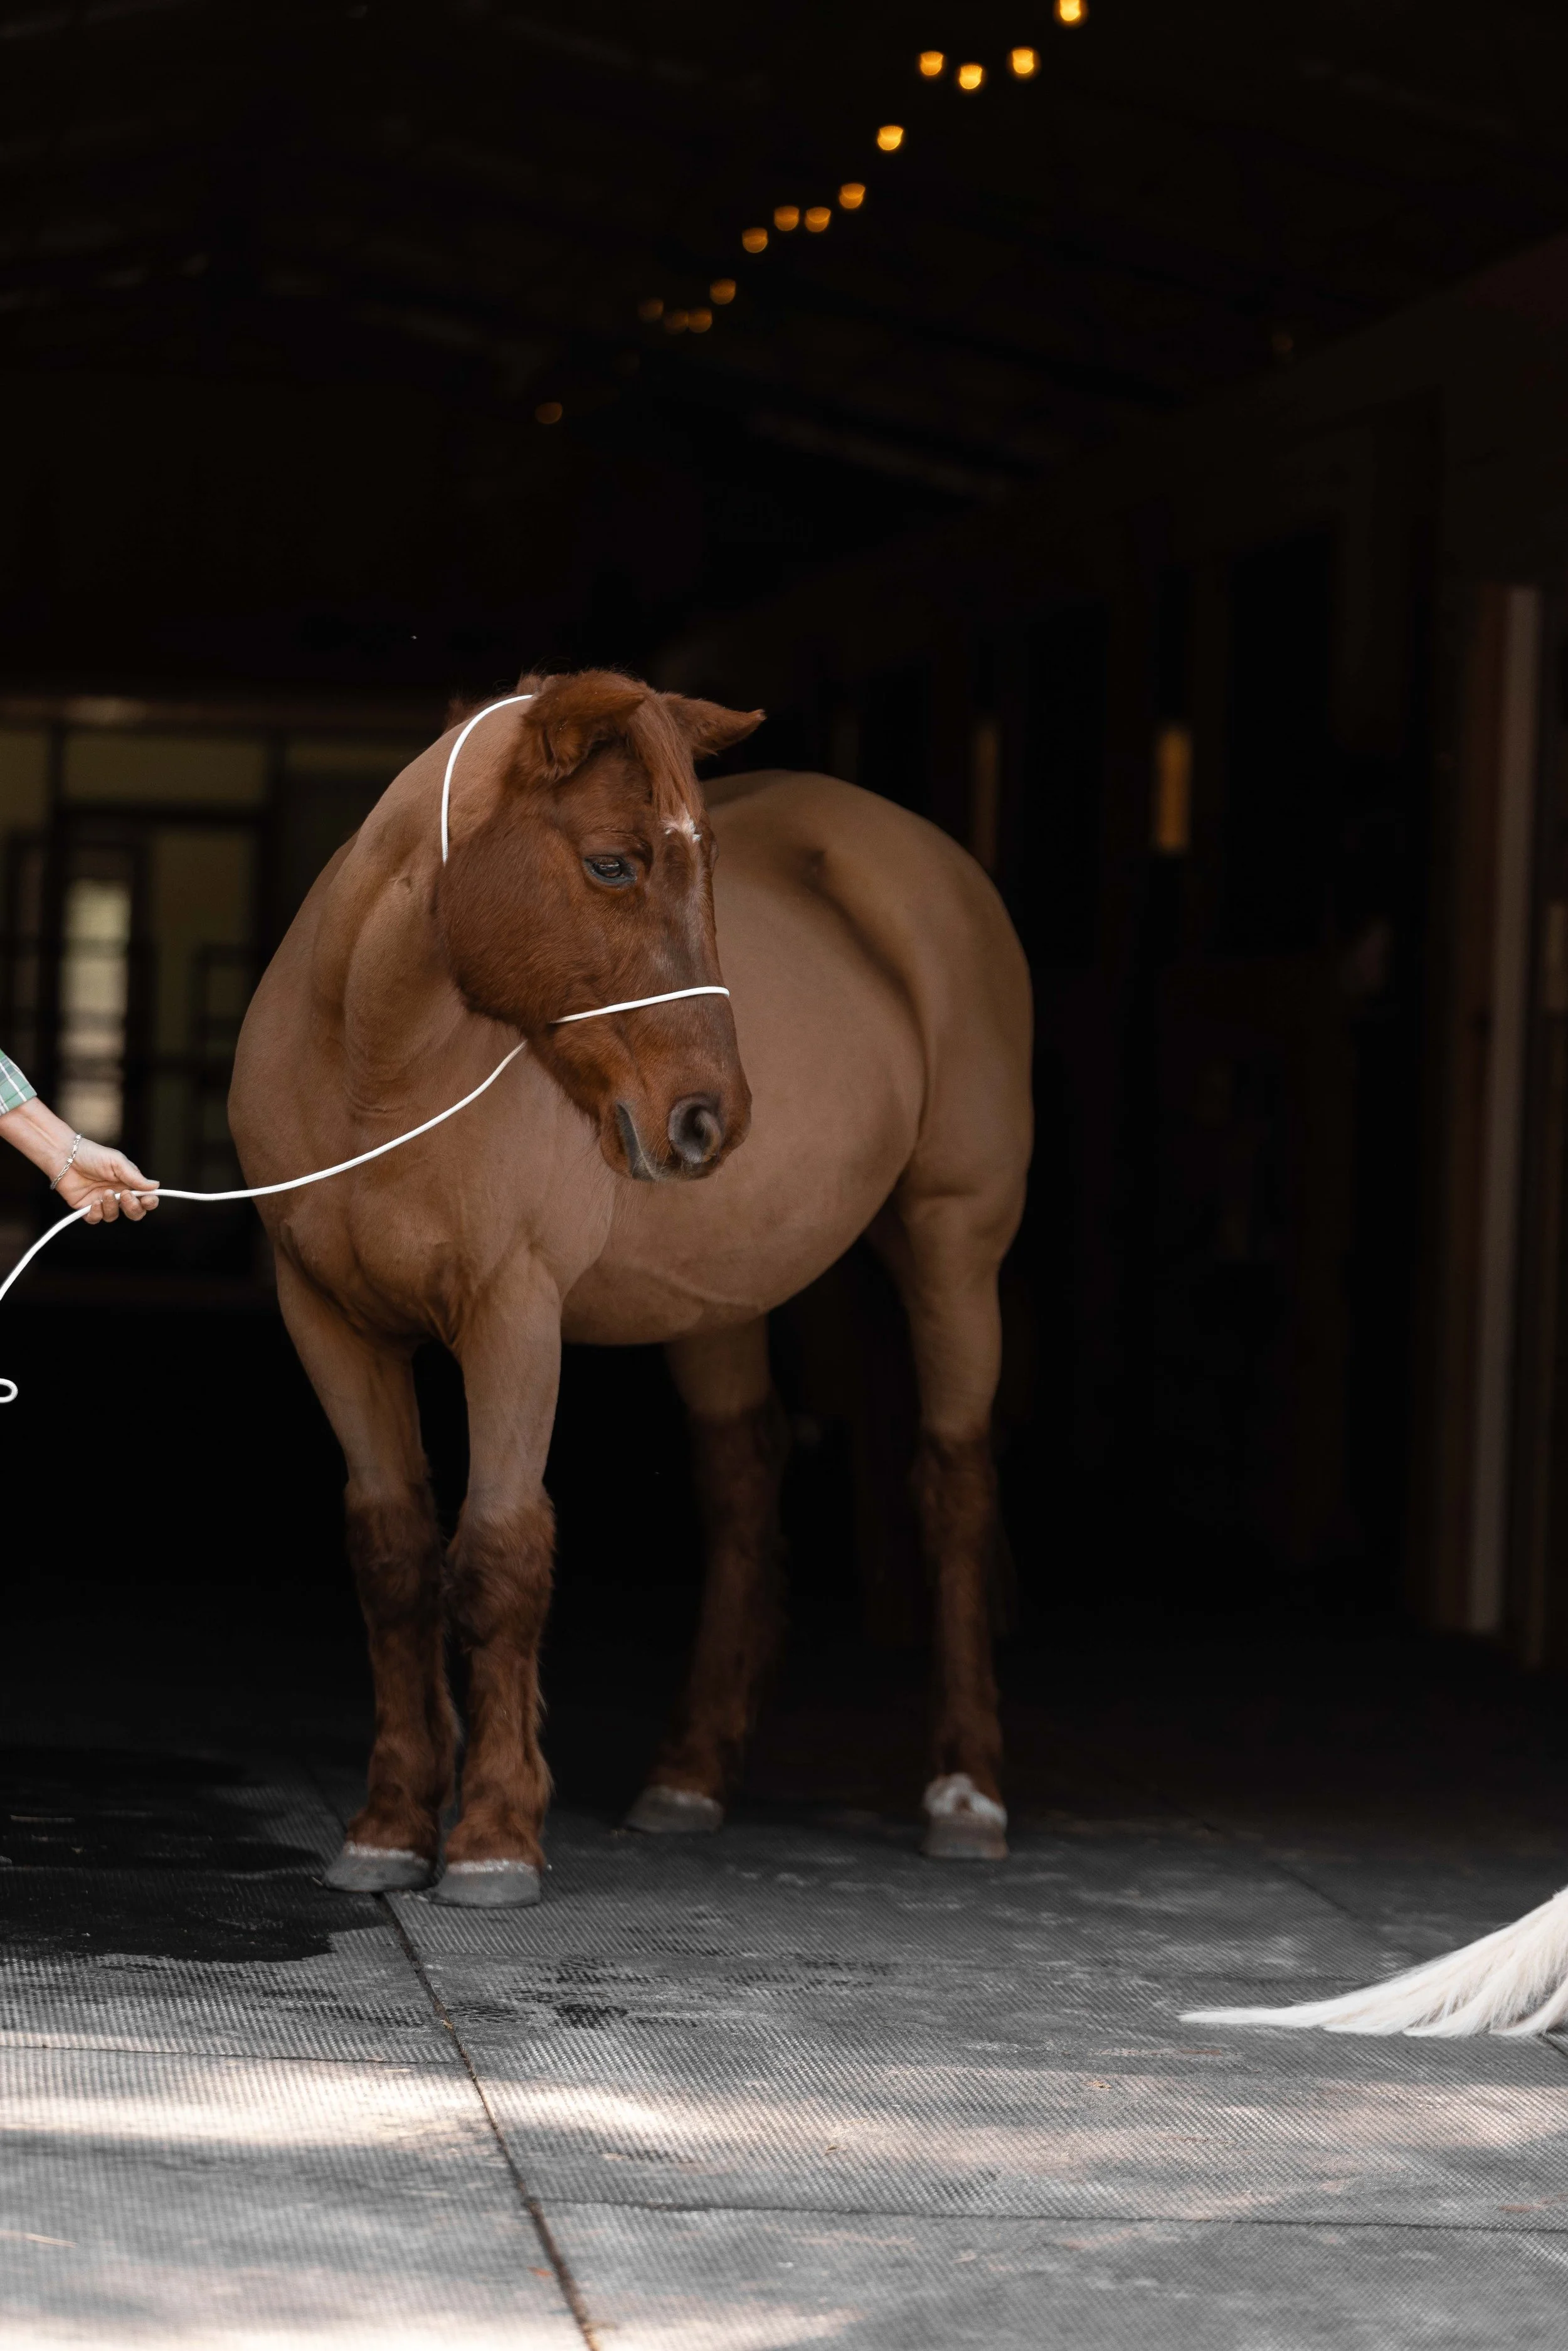
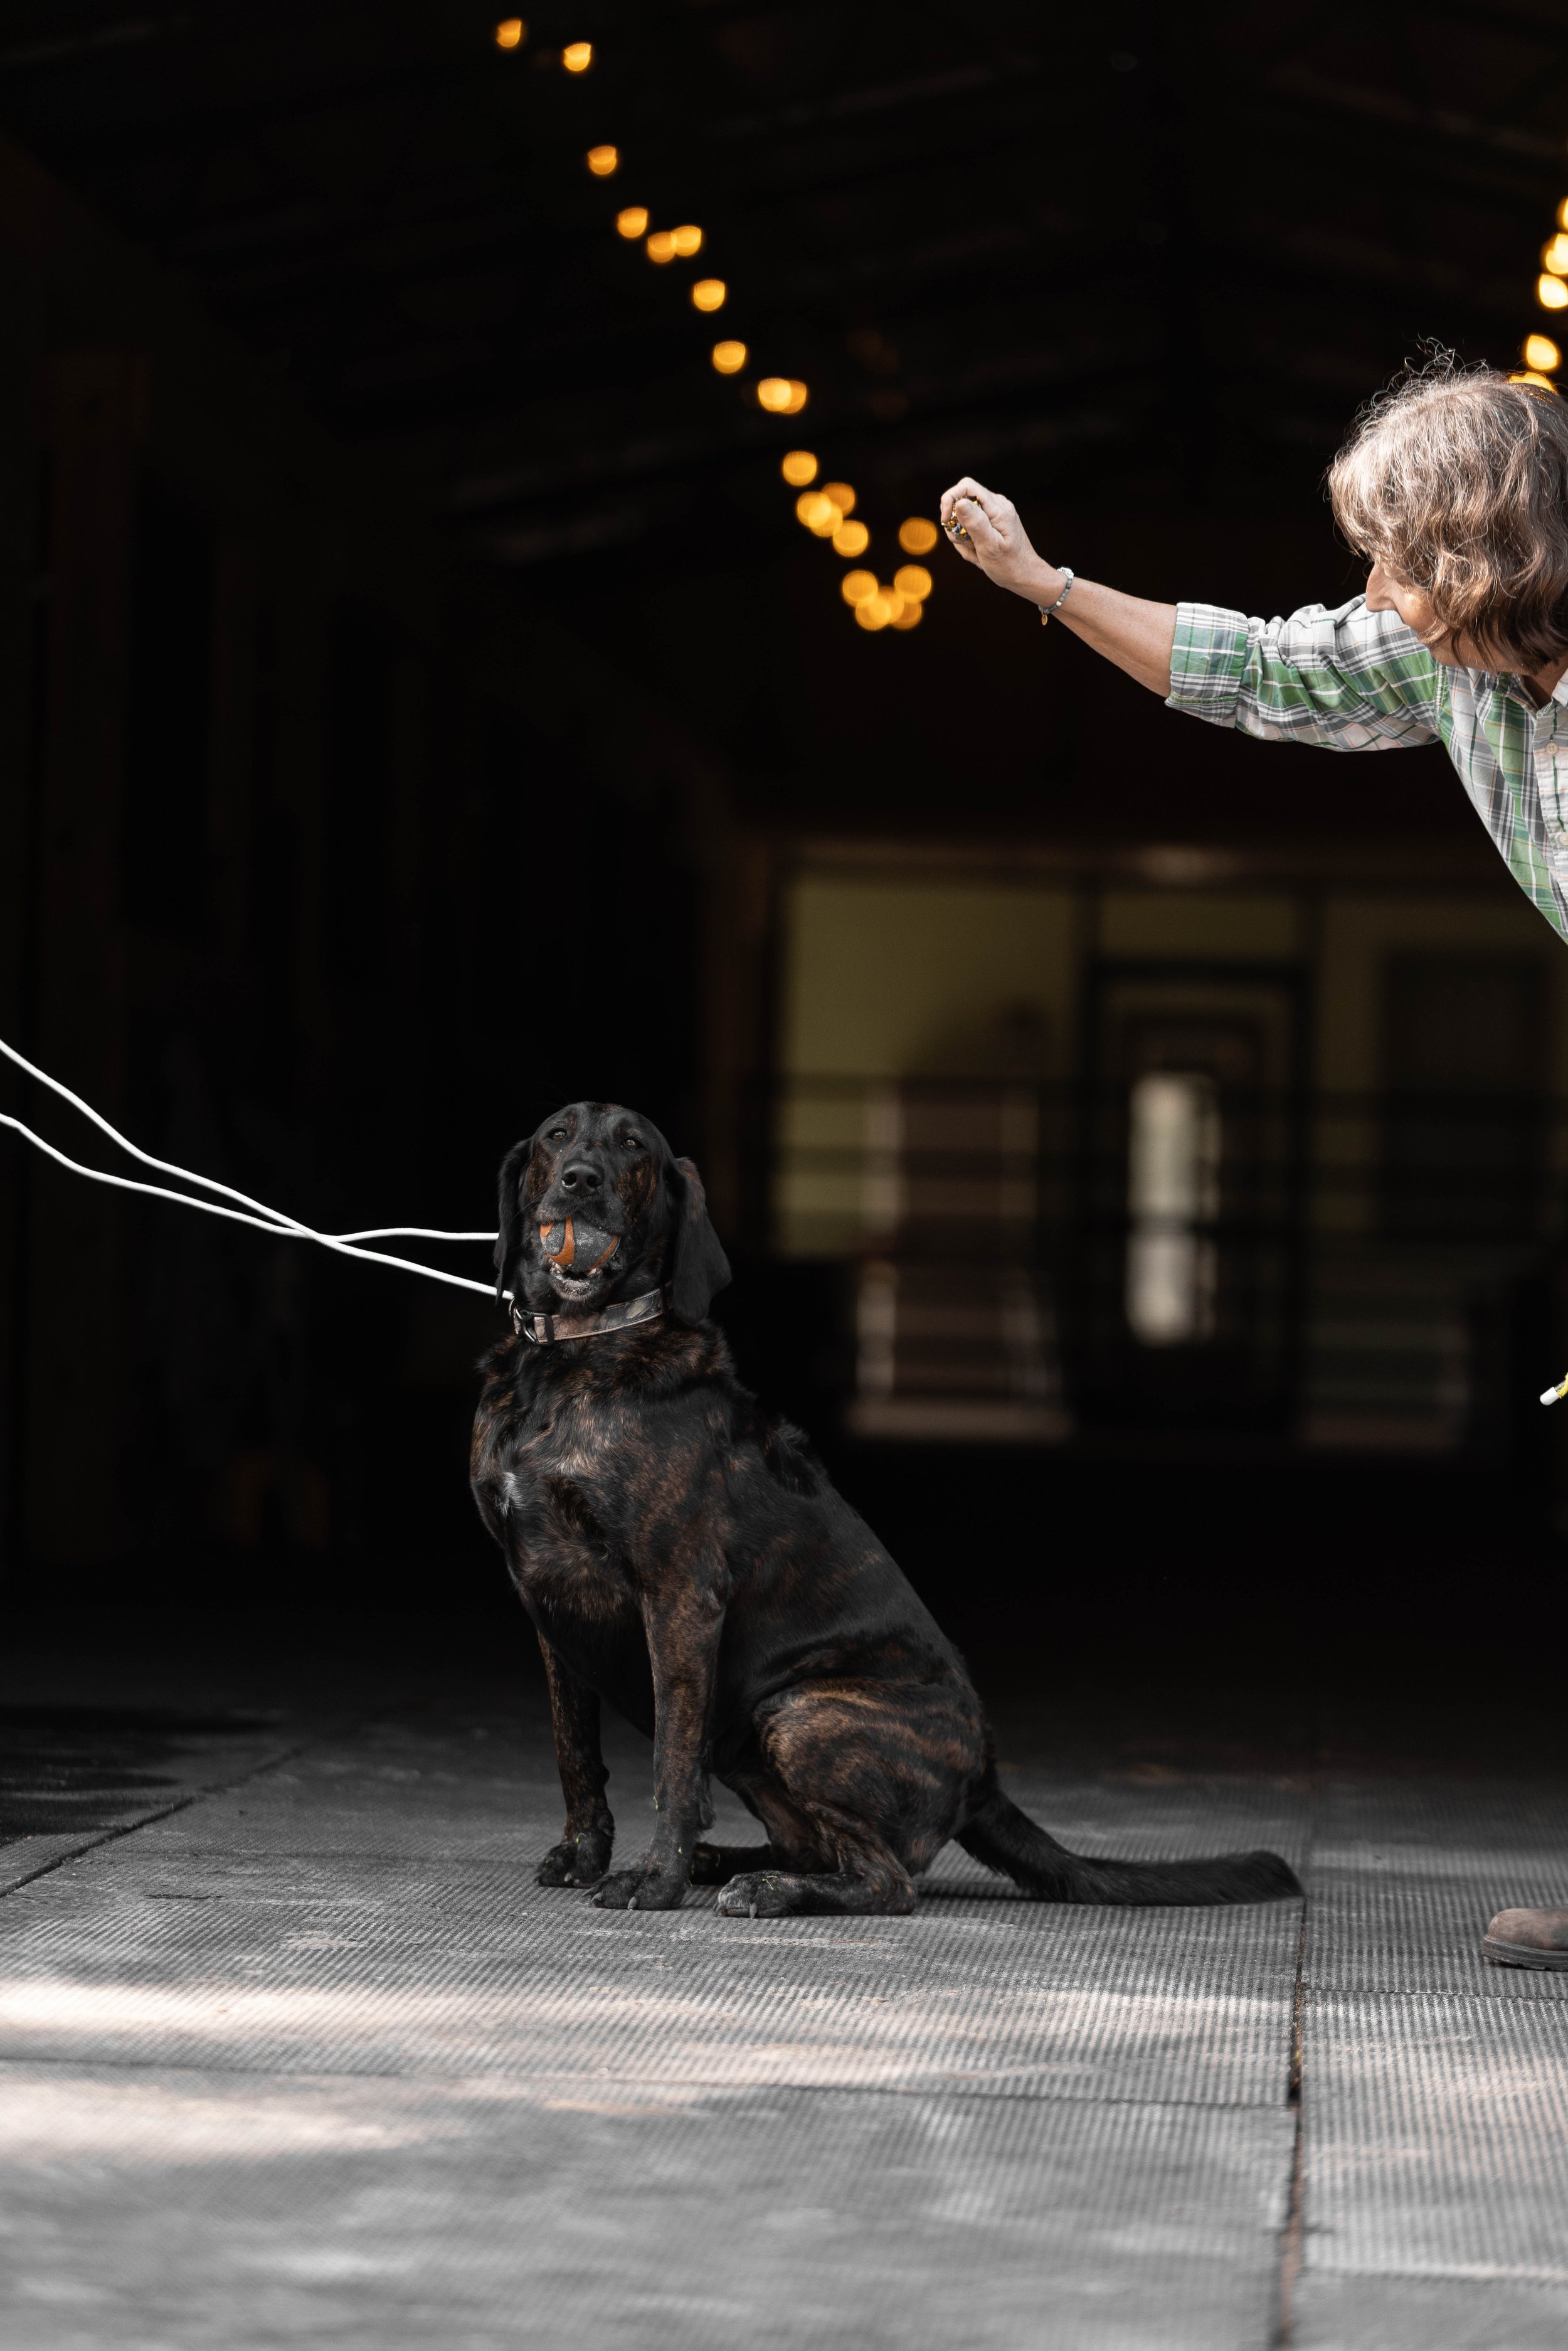
After discussing a rough plan for poses, my assistants and I photographed each animal individually. For safety’s sake, each was captured solo and later thoughtfully composited in post-production, allowing us to create the final image without sacrificing the well-being of anyone involved—both two-legged and four-legged.
A variety of tools were used throughout the shoot—and no, not the ones you’re probably imagining. Think squeaky tennis balls, crinkly cat toys, oversized fan-like feathers courtesy of Michael’s craft store, baseball caps, hands—really anything that could grab attention and bring out natural expression. From start to finish, all of the animals were photographed in roughly 21 minutes total, a true testament to their easy, willing-to-please nature and to a calm, well-trained crew. Truly a photographer’s dream.
Step 2: Culling with Intention
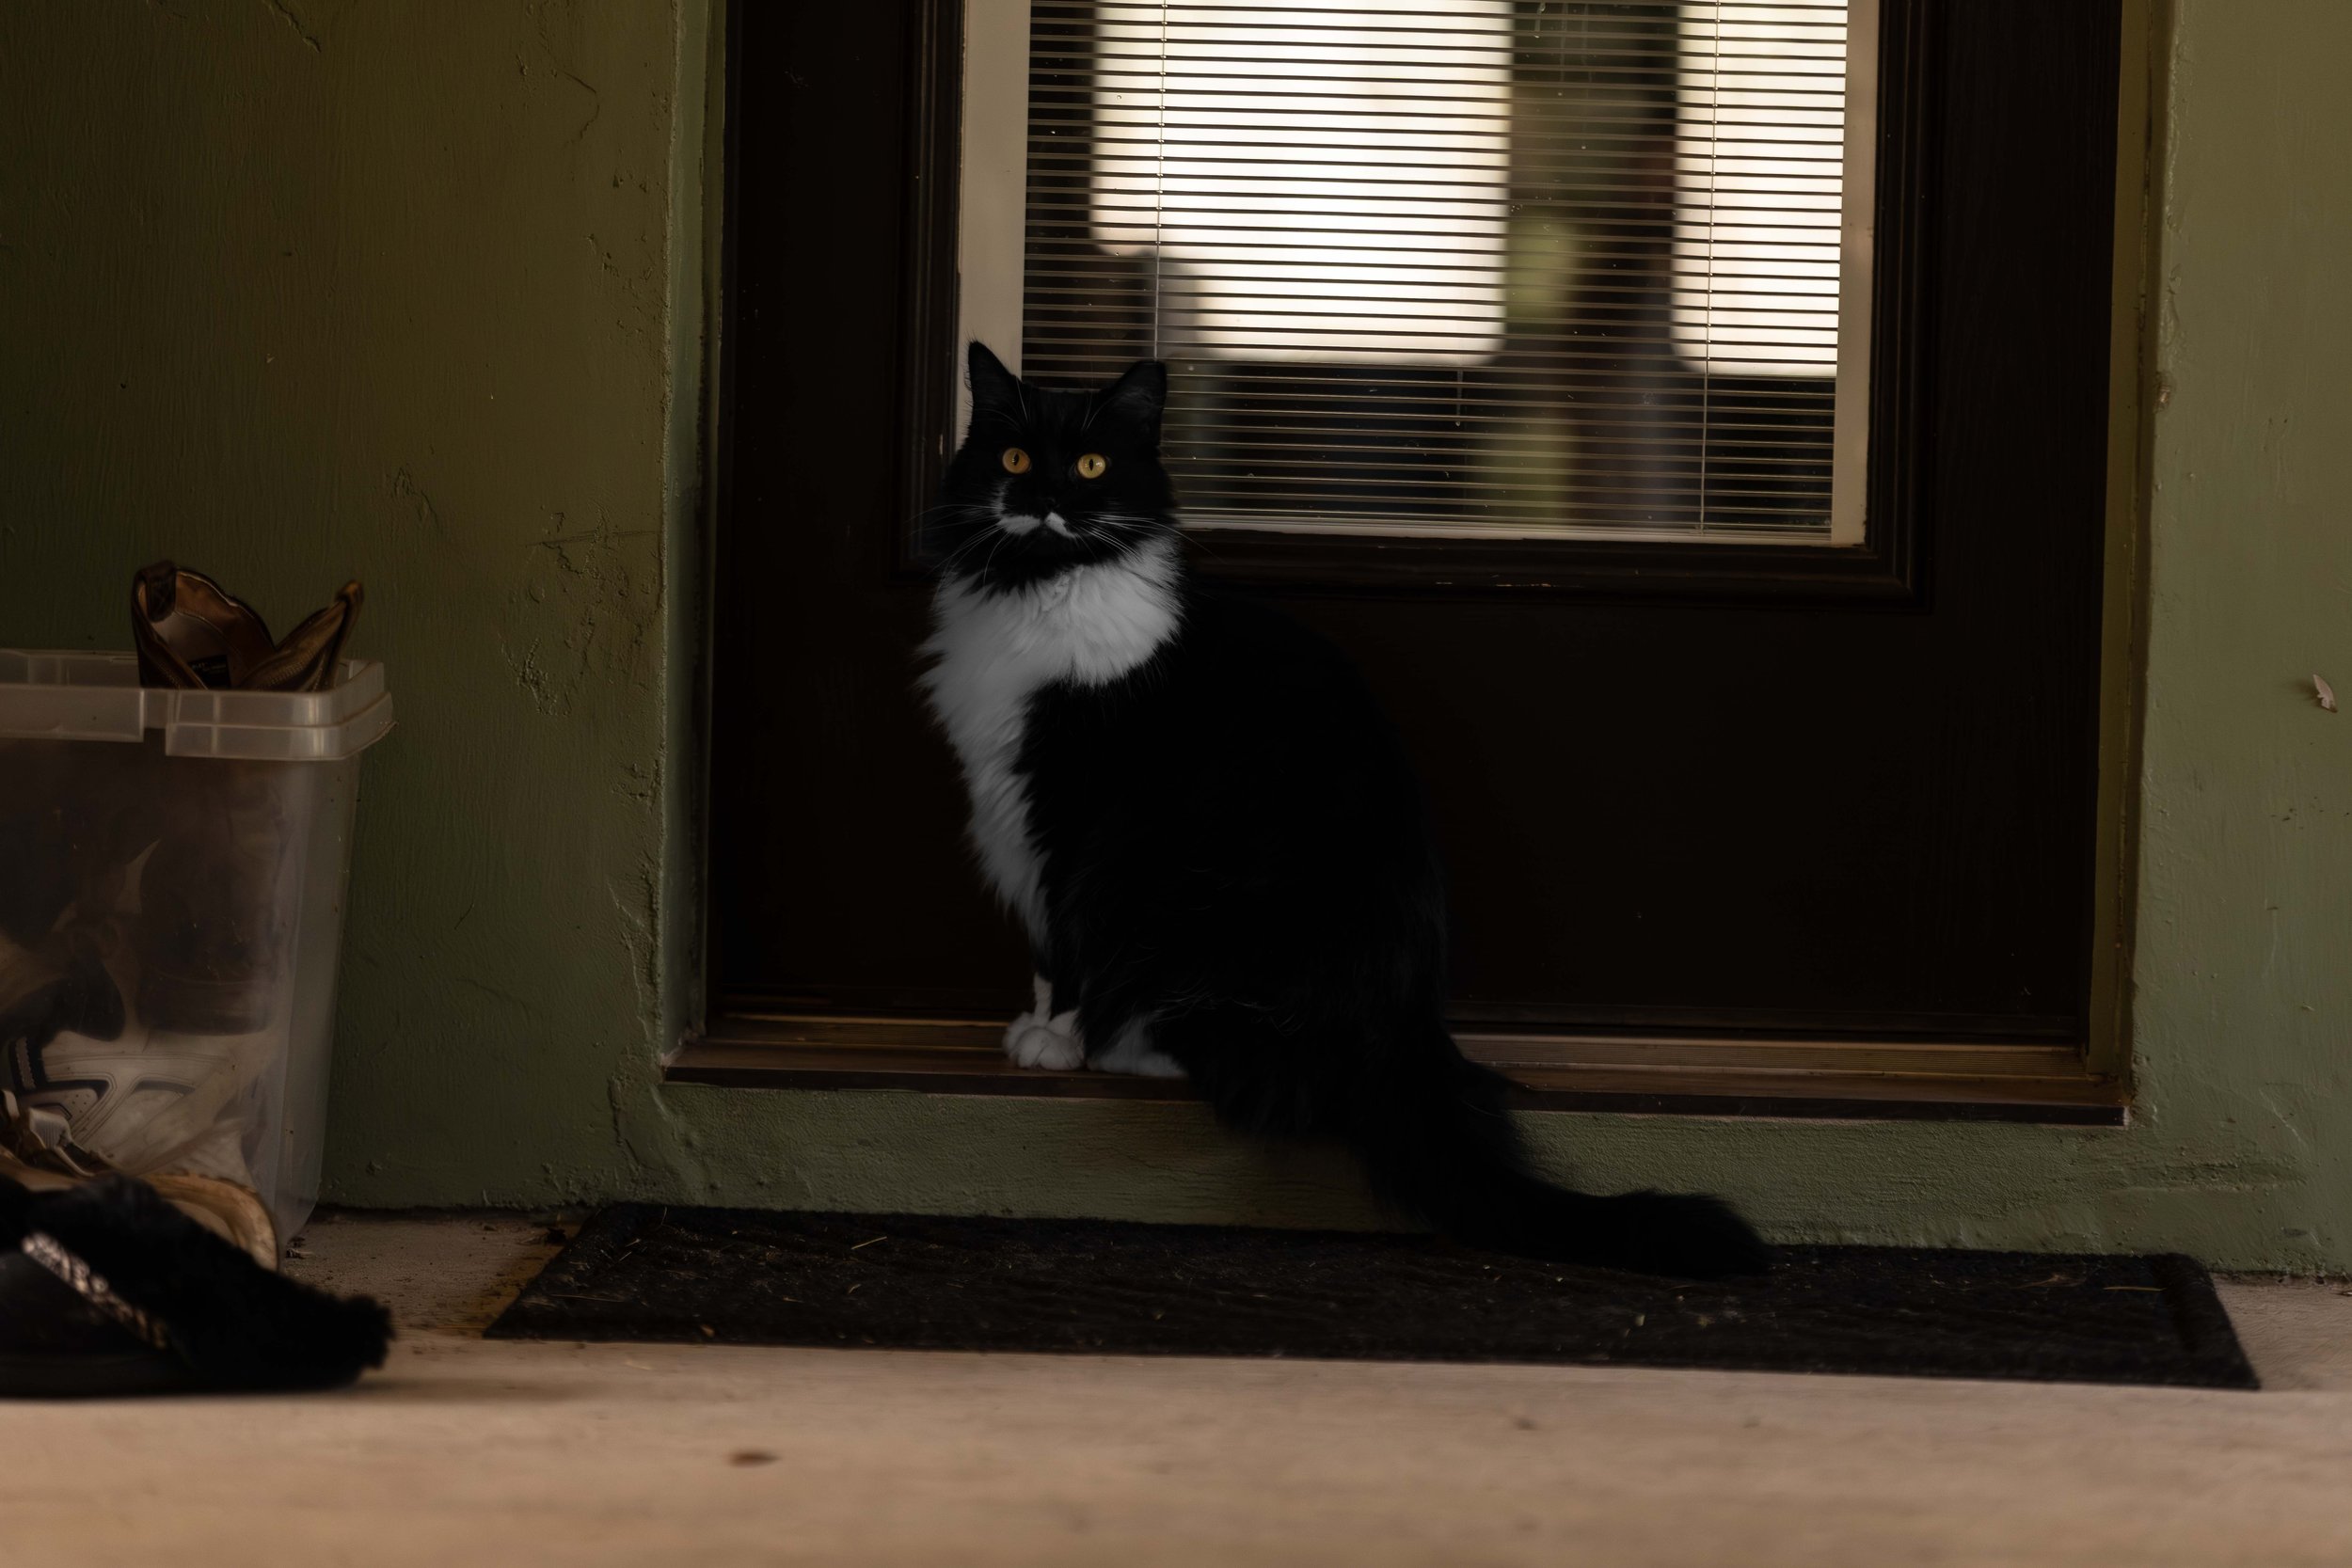
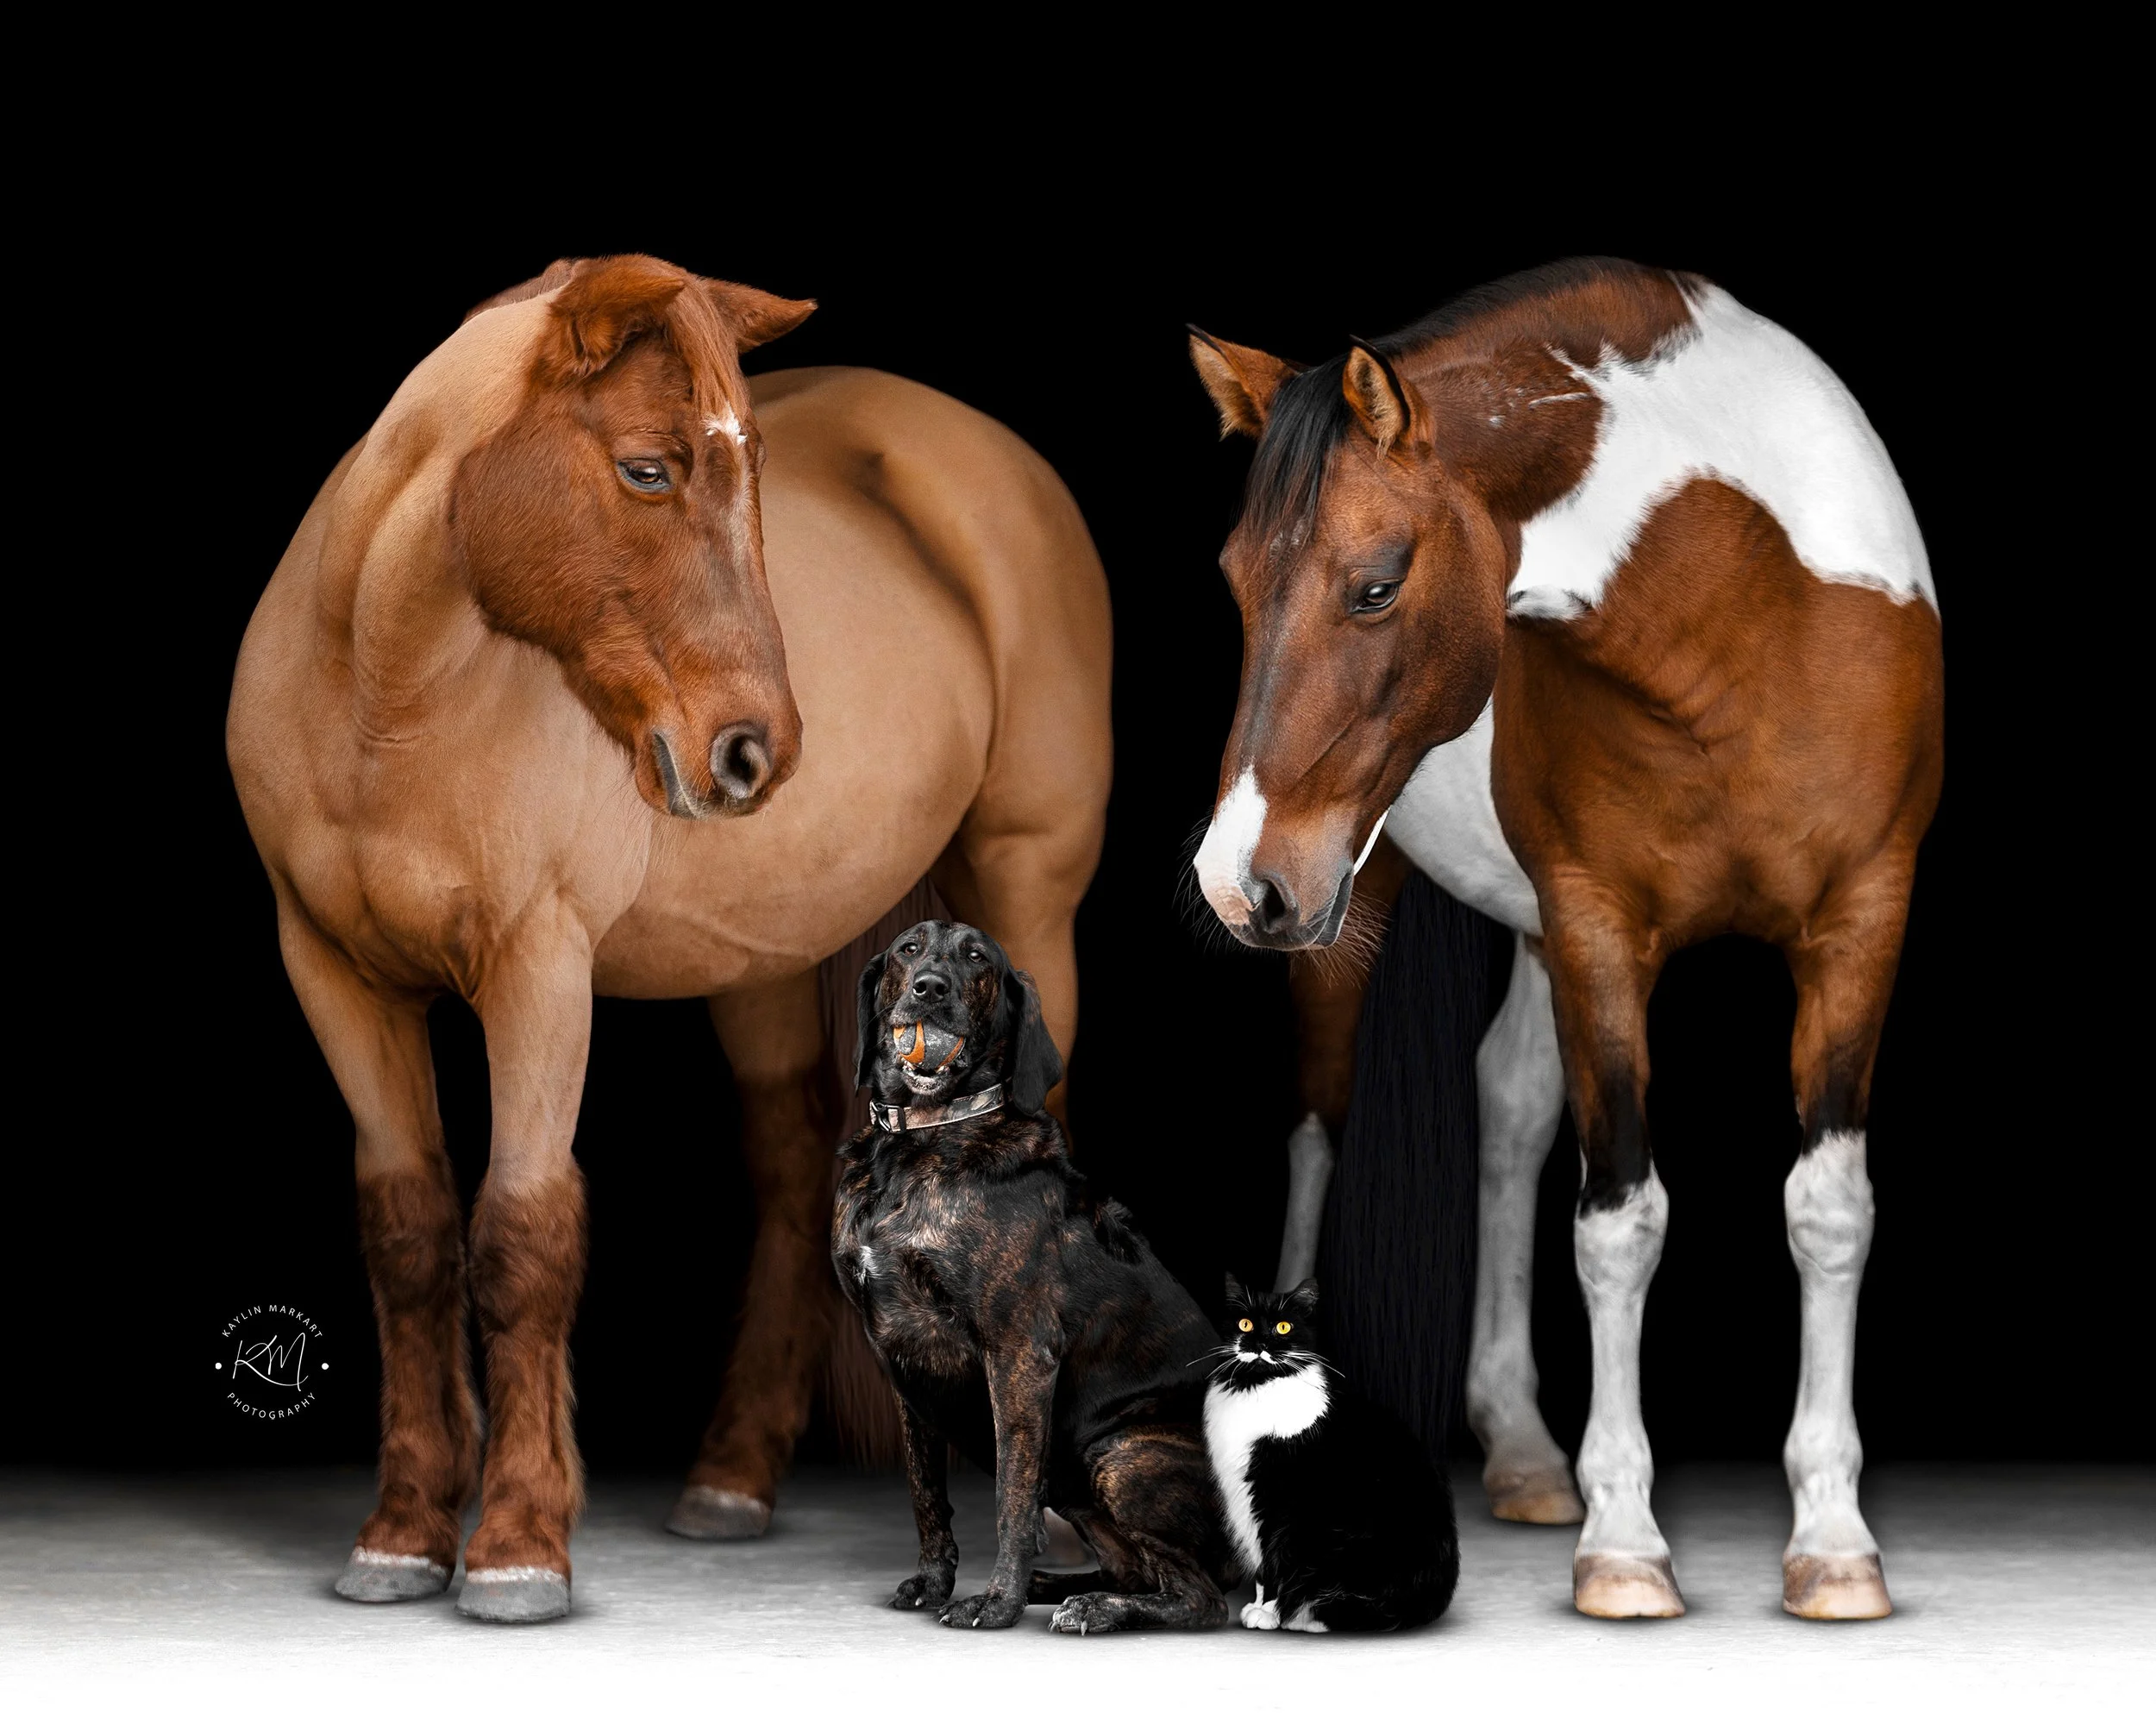
Back at my editing desk, I carefully selected the images that best told each animal’s story. Sugar’s floppy ears, Windy’s BLM Mustang brand, Bre clutching her beloved ball, and Boopsie looking calm and content—every little detail brought their personalities to life.
Step 3: Building the Composition
Next came Photoshop—where the puzzle pieces truly start coming together. I played with several compositions before settling on the final layout, then began the background “painting” process that’s synonymous with black background portraits. This stage is where the image really starts to feel cohesive and intentional.
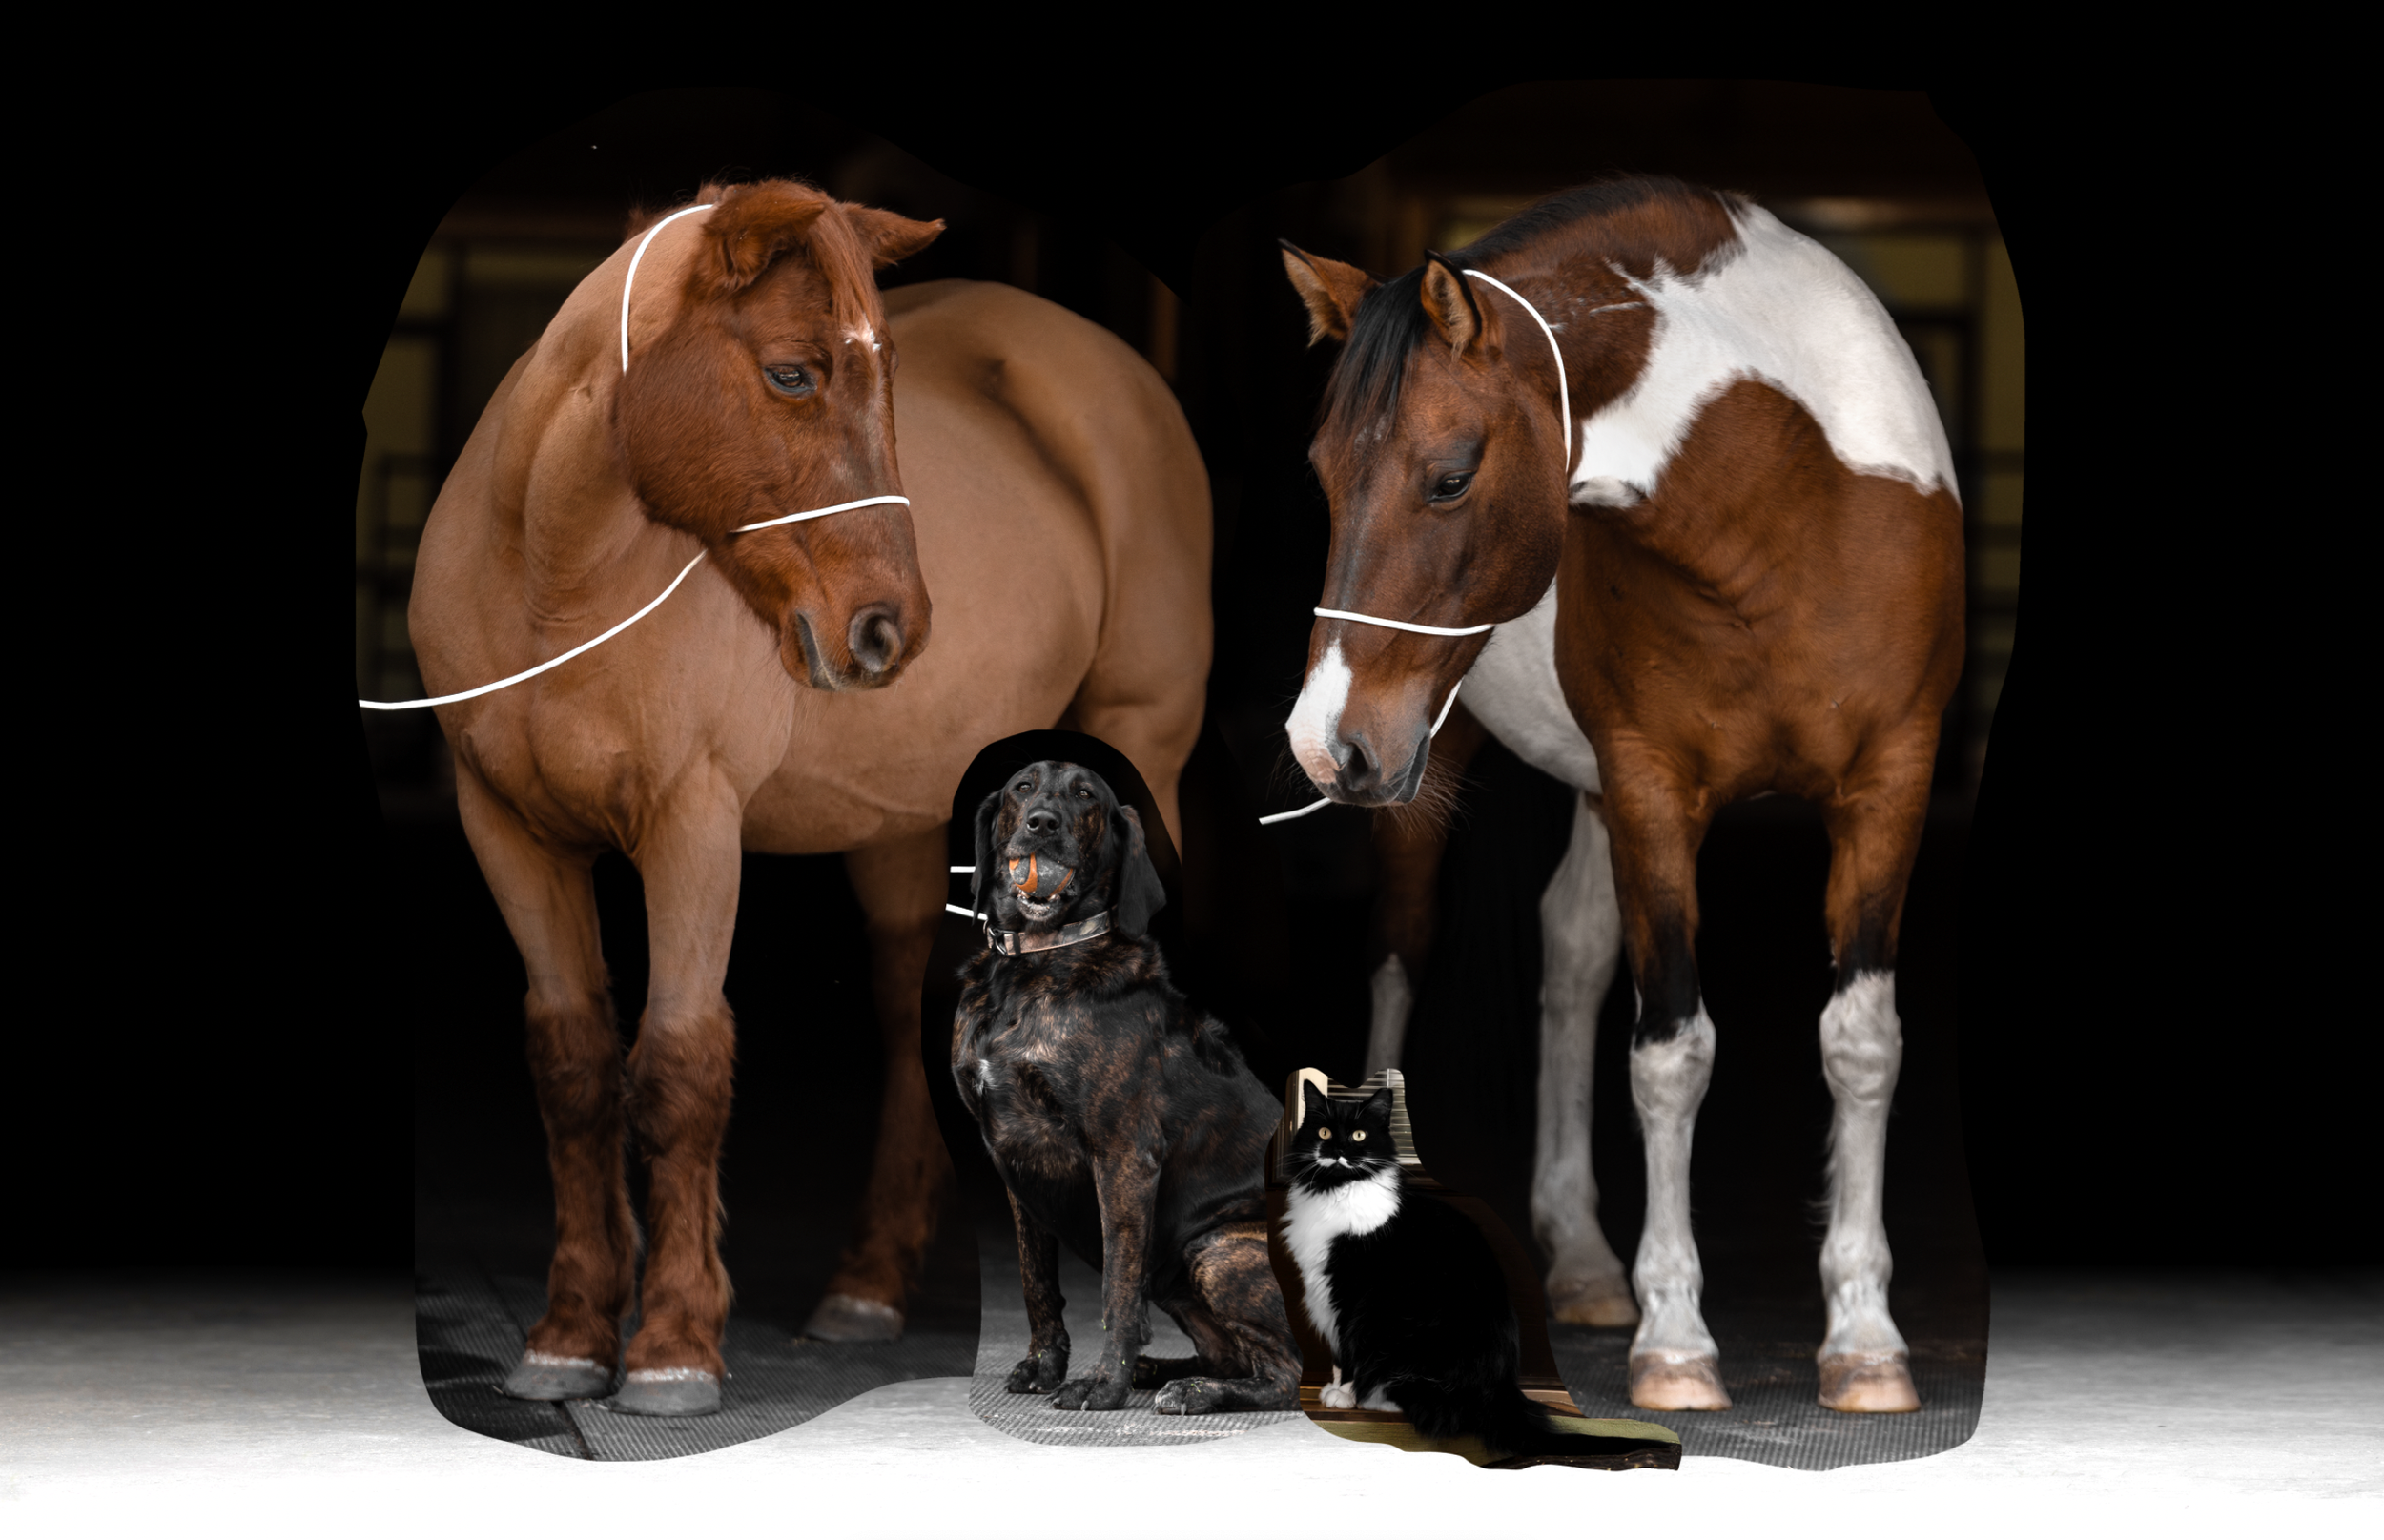
Step 4A: Refining the Details
At this stage, halters and the dog leash are removed to create a clean, distraction-free look. Subtle adjustments to hue, saturation and contrast ensure each subject is naturally integrated within the composition.
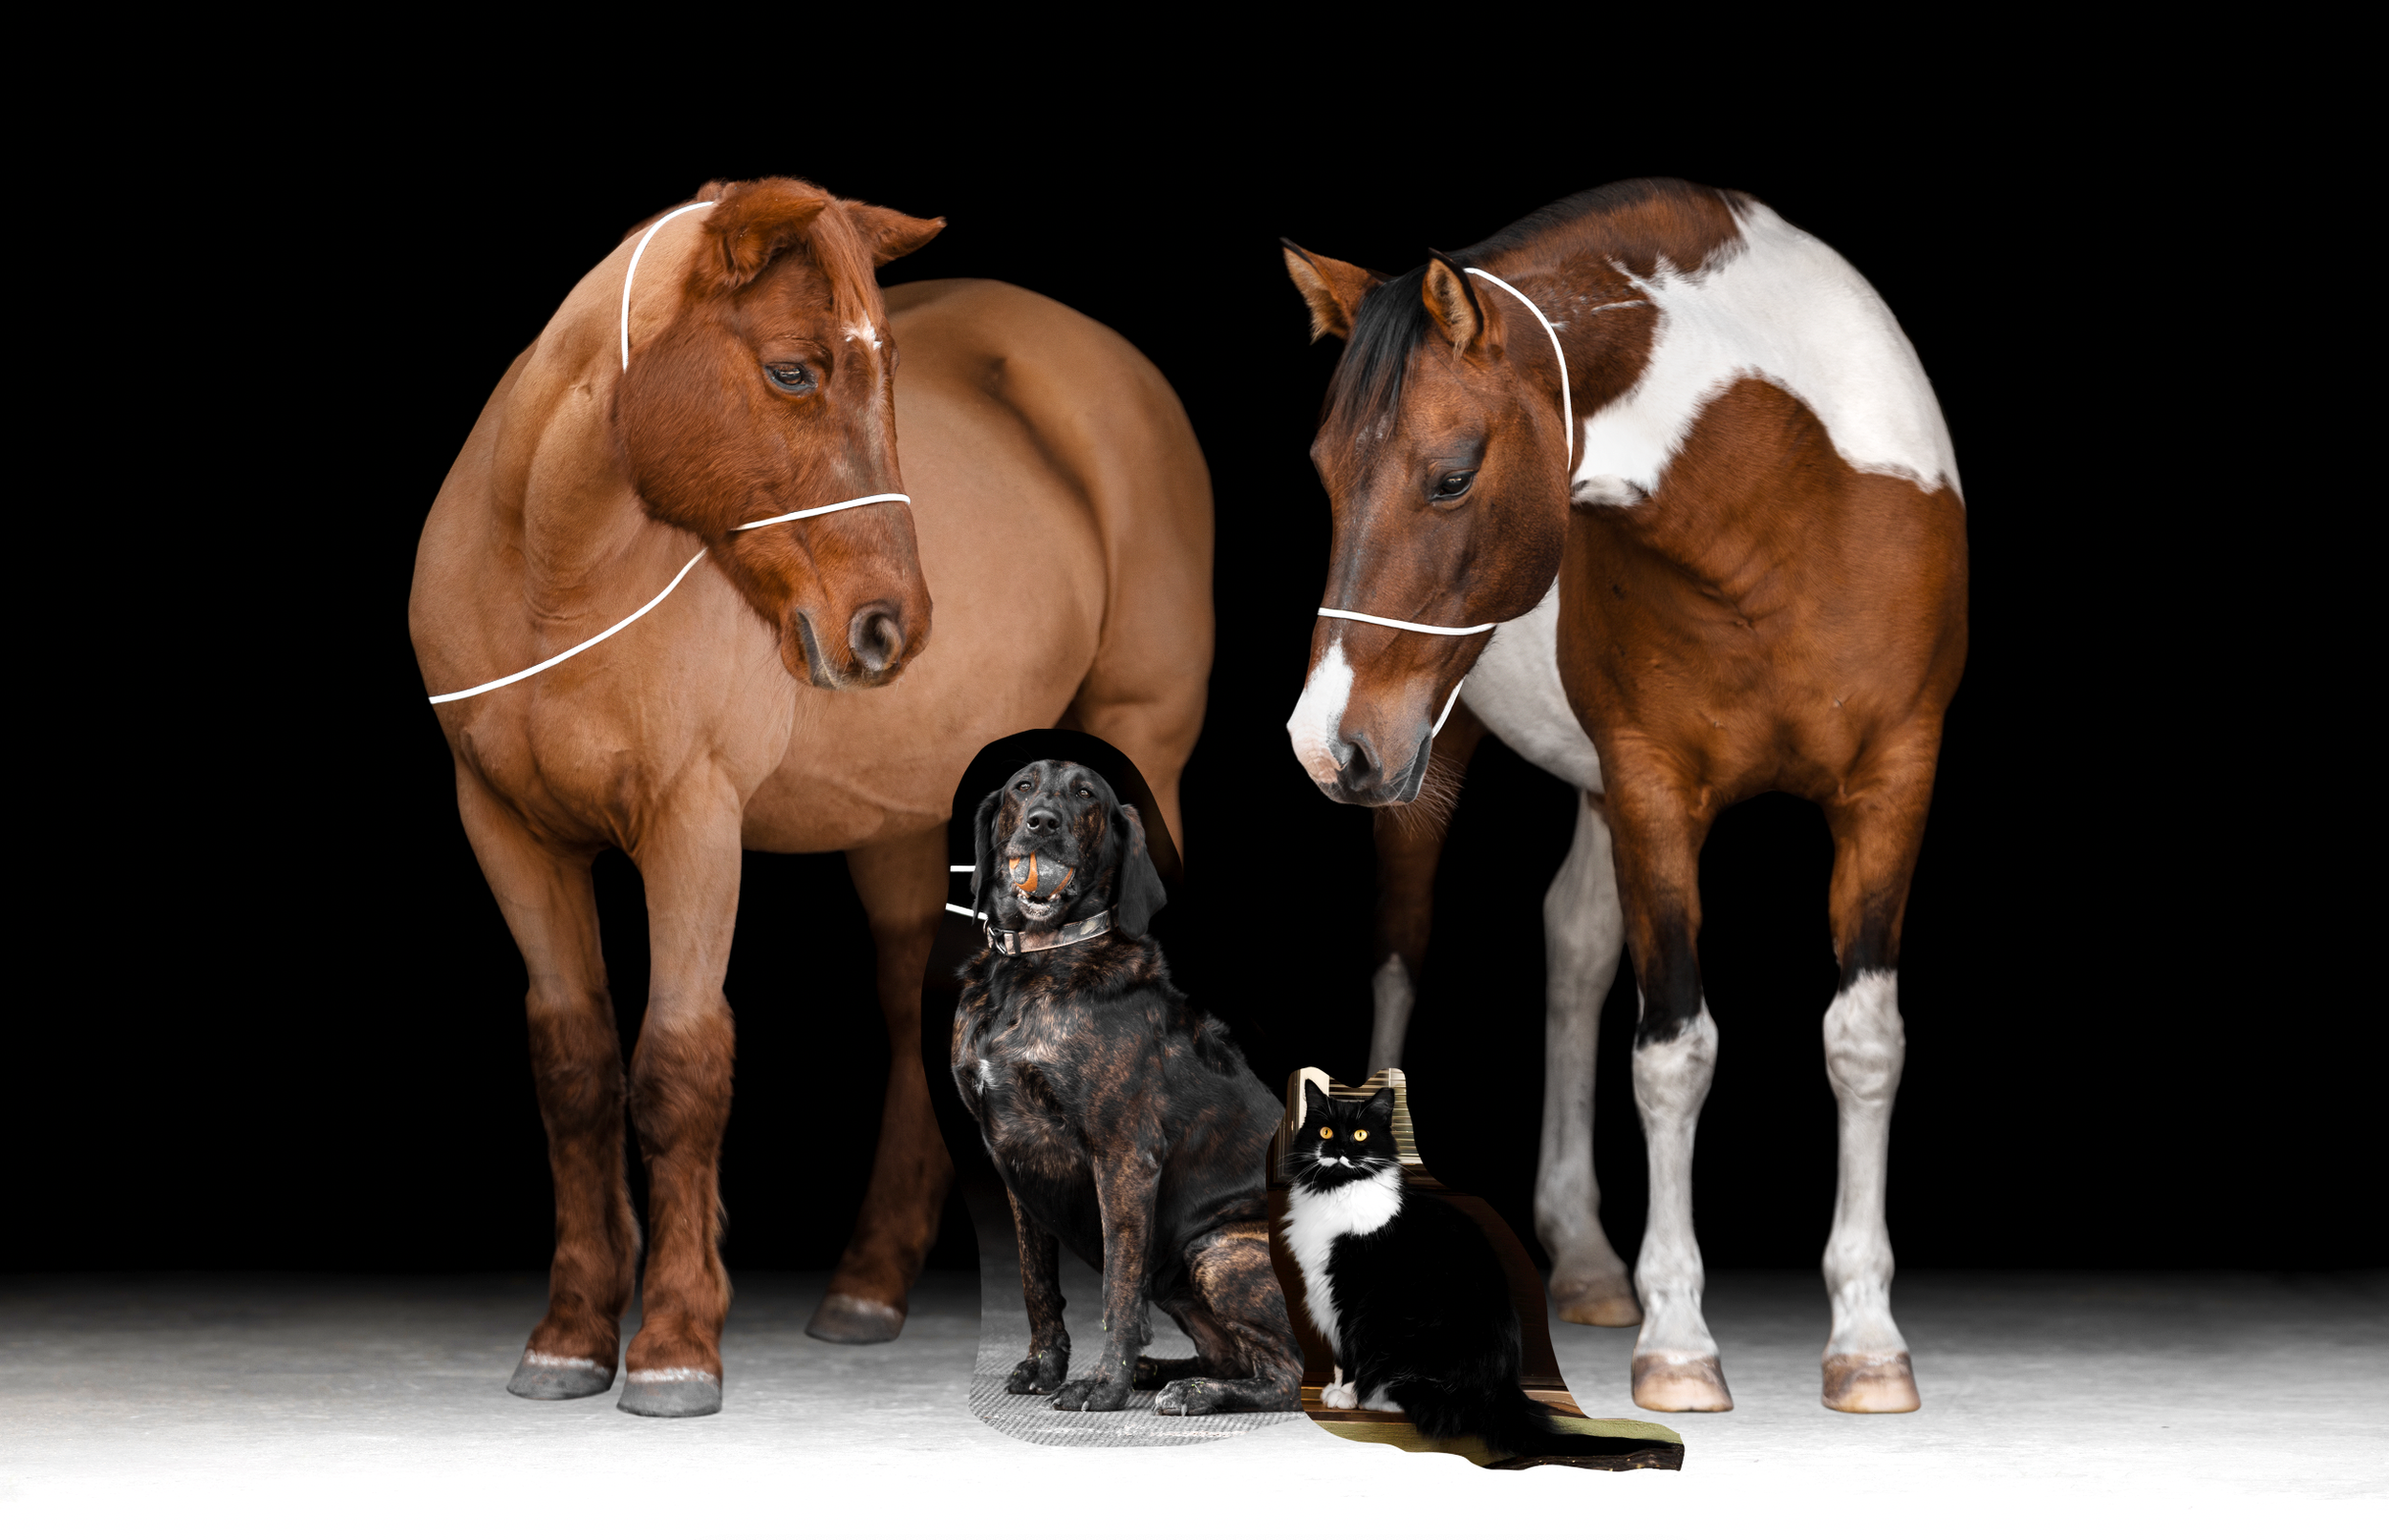
Step 4B: Adding Back Key Details
Once the base edits are complete, additional details are carefully added back in, including eye highlights, whiskers, hoof and leg shadows, tails, and any fur or hair textures. Dodging and burning are applied strategically to enhance depth and dimension, ensuring the final image retains a true-to-life appearance rather than looking like a sticker-like cutout.

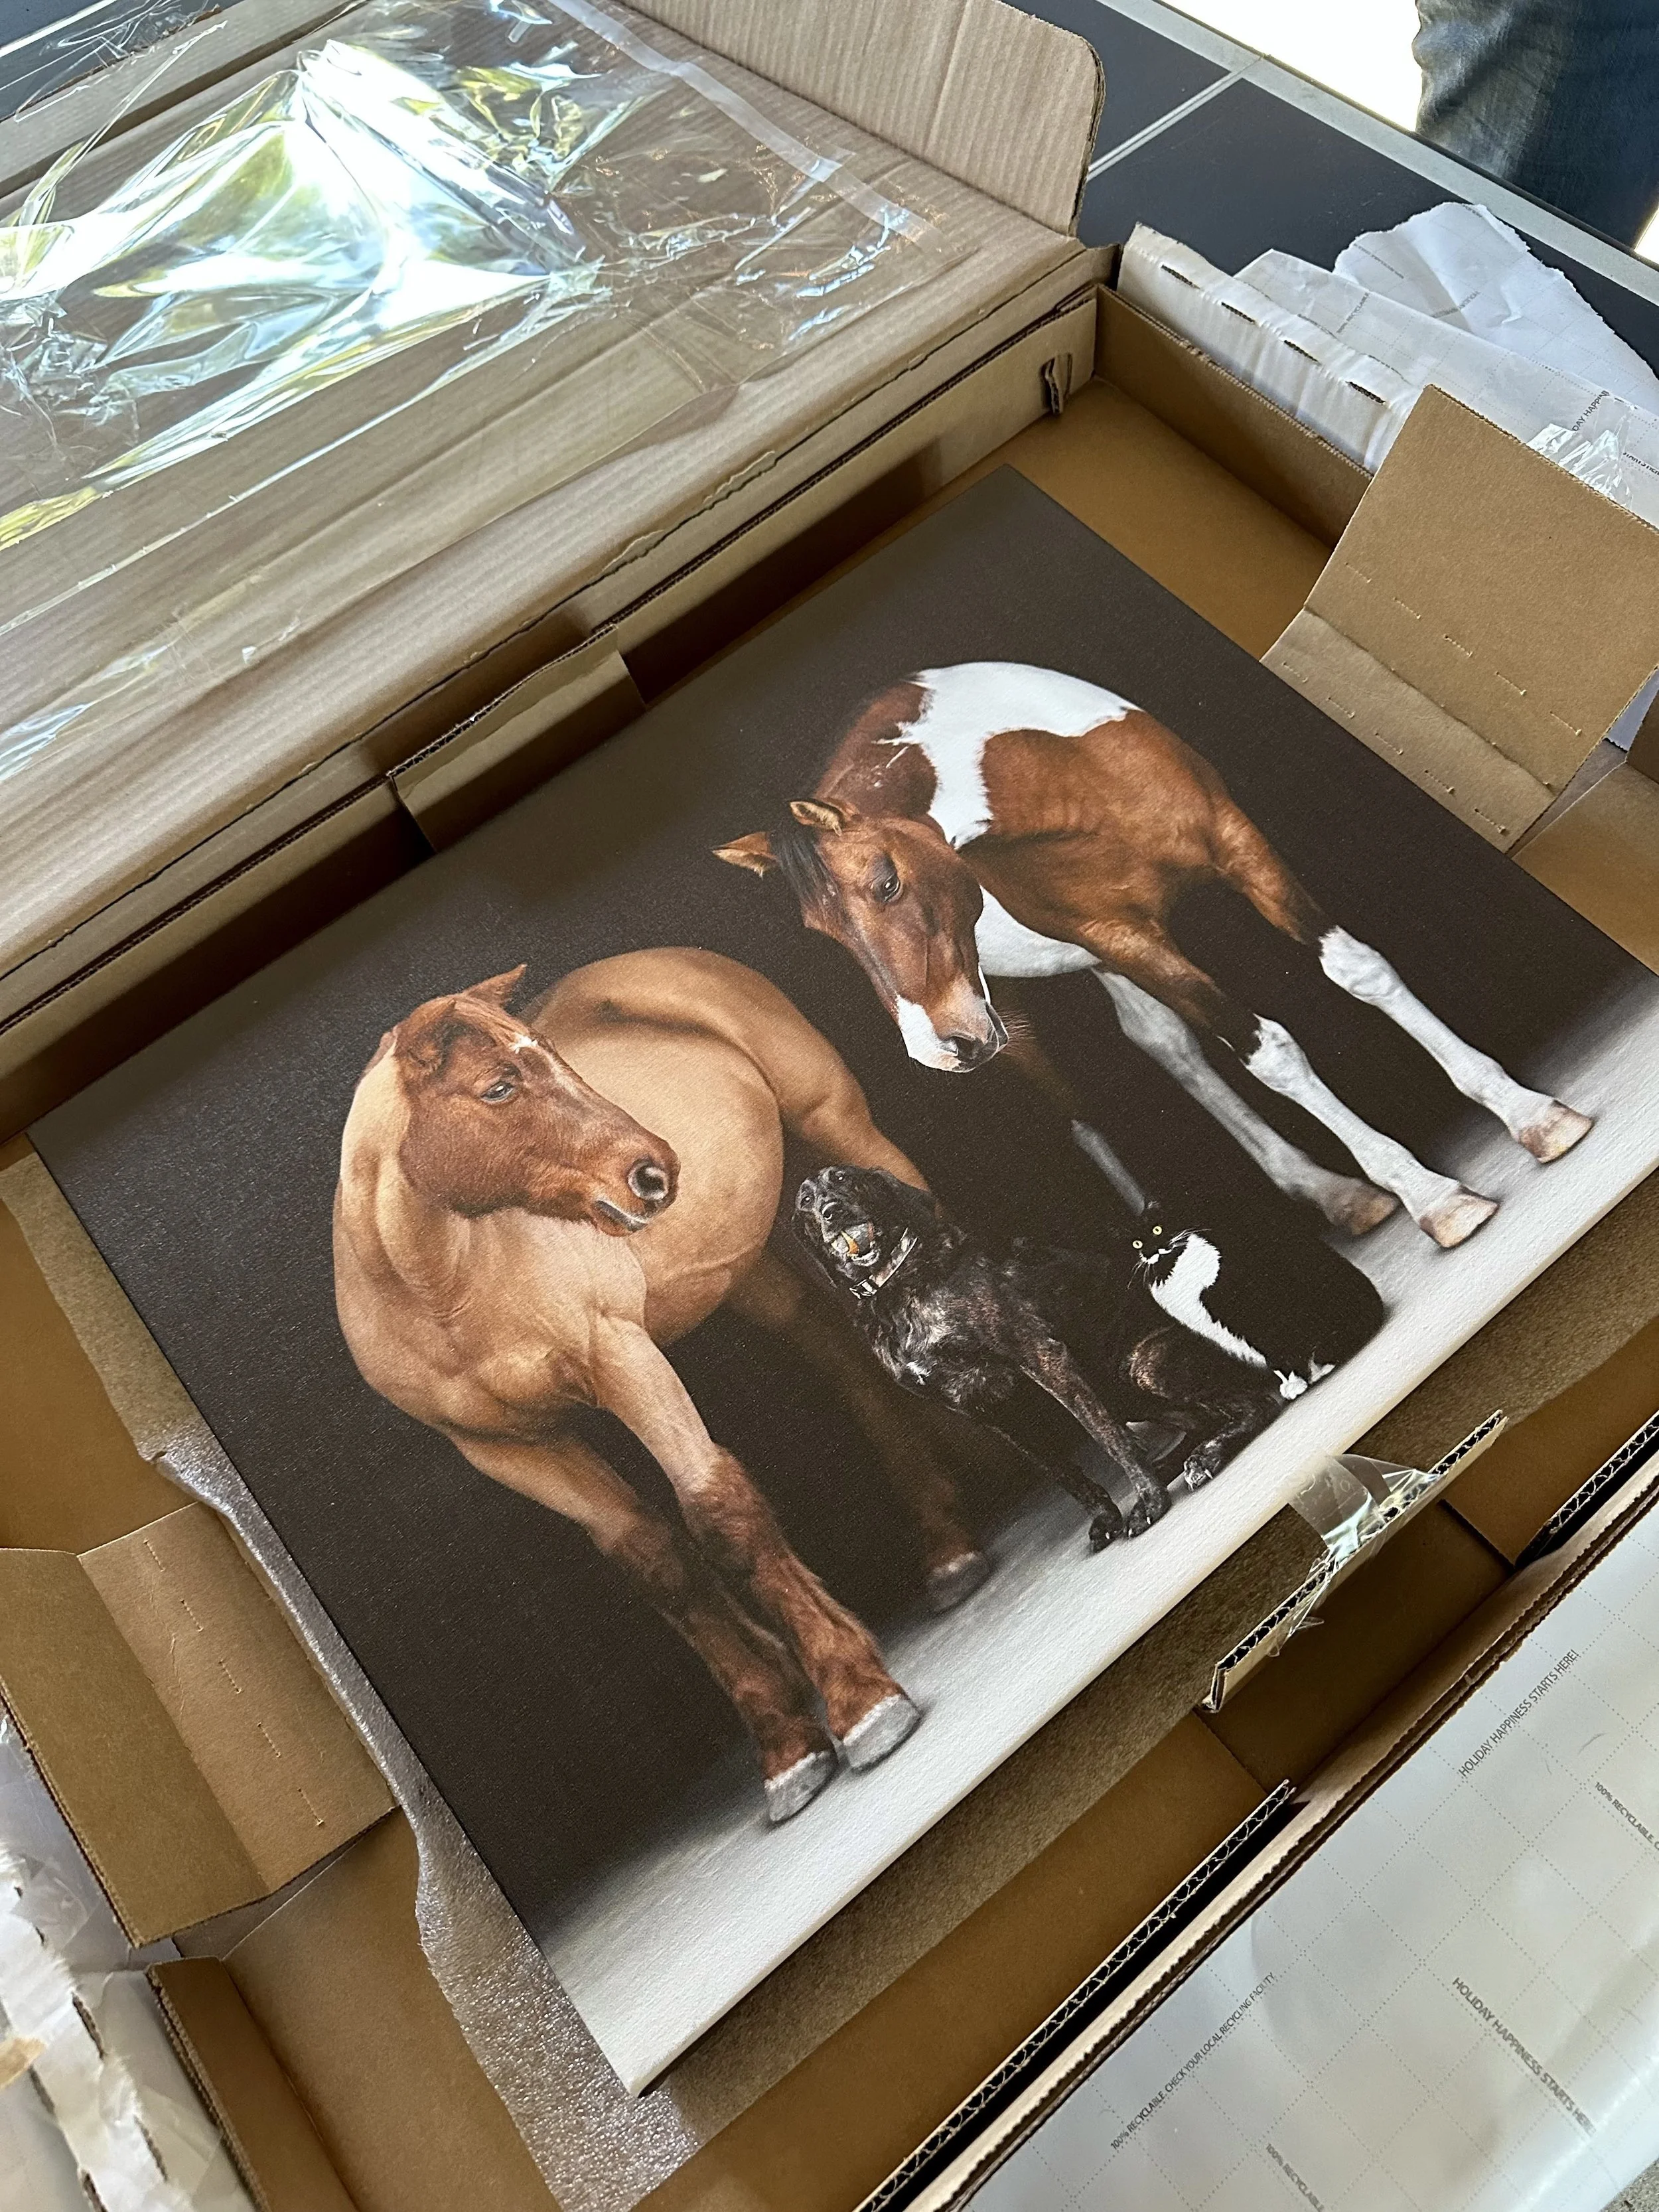
Step 5: Planning the Final Print
With the image fully refined, I reconnected with the client to figure out printing—balancing budget, size, and keeping the intended display space in mind. This step ensures the final piece not only looks beautiful on screen but translates seamlessly into a finished artwork meant to be enjoyed for years to come. The client ultimately decided on a 16 × 20 wrapped canvas finished with a black border—a detail that perfectly complements the dramatic black background and helps bring the entire piece together. To accommodate the canvas size, a minor crop from the original 2:3 ratio to 4:5 was necessary.
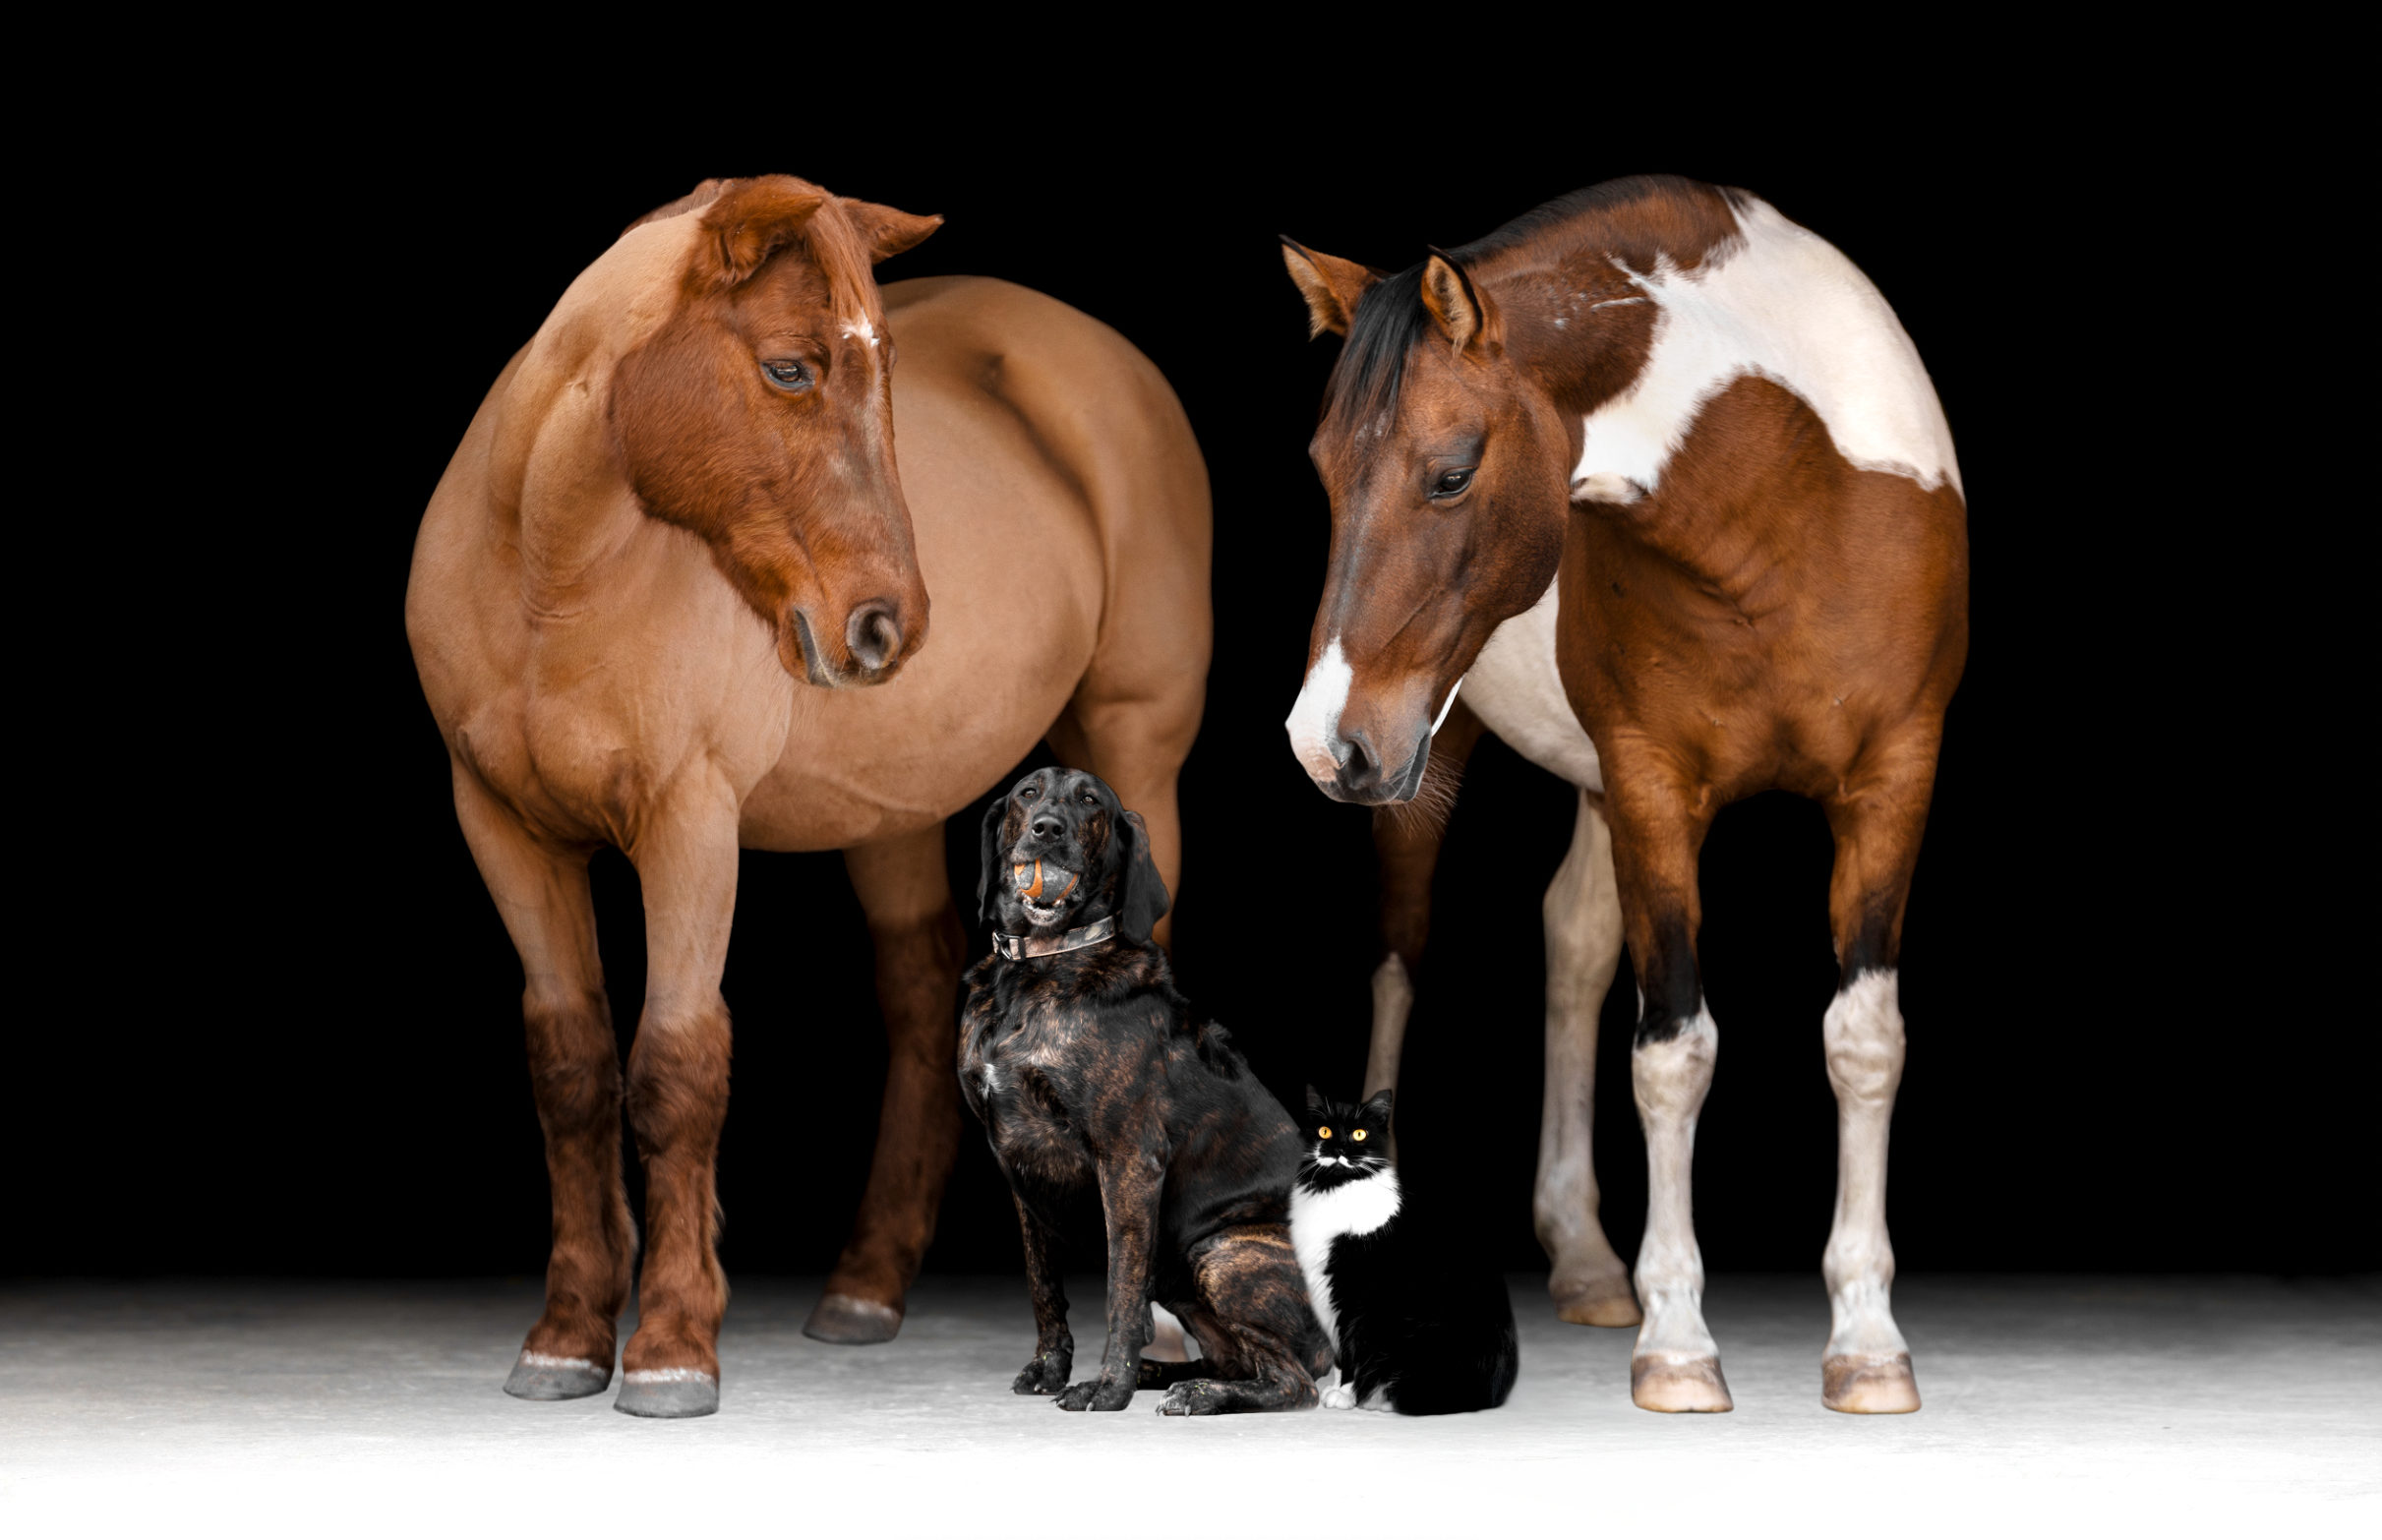
Step 6: The Finished Piece
All said and done, the final product represents roughly 12–15 hours of hands-on work. It’s a true labor of love and worth every second—especially knowing the finished image now lives on as a 16 × 20 wrapped canvas with a black border inside the client’s home.